
Build a Dart Grip You Can Repeat Without Squeezing
Find comfortable finger placement, judge grip pressure and compare front, middle or rear holds. Use a 30-dart audit to track adjustments and releases.
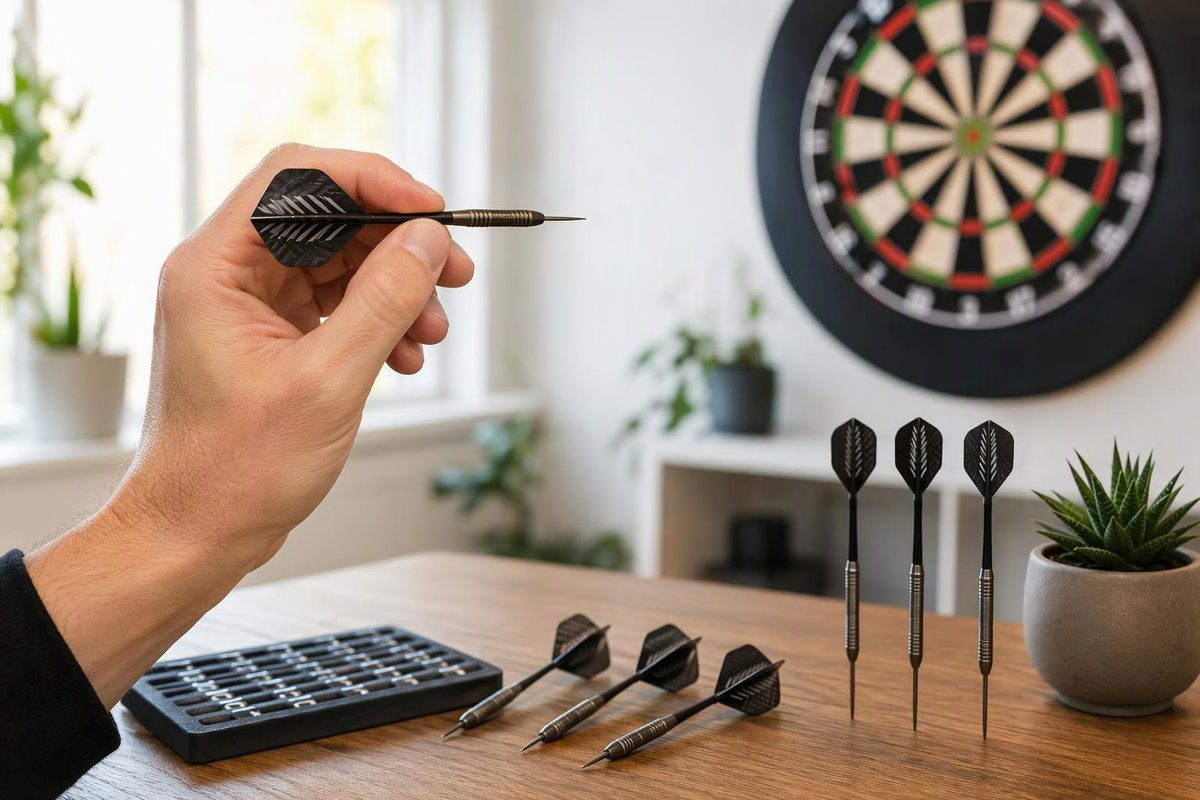
Hold a dart with your thumb and index finger on the barrel and your middle finger providing light support. Use enough pressure to keep it secure without squeezing. Start near the dart’s balance point, then adjust for comfort. The goal is a grip you can recreate on all three darts and release smoothly—not a particular finger shape copied from a professional.
Enter your three tallies after the 30-dart check below; the tool suggests what to examine next.
30-Dart Grip Audit
Your Next Check
Enter all three tallies to get a next check. Each count is out of 30; an unrecorded tally is unknown, not zero.
- Target-area hits: — / 30
- Finger adjustments: — / 30
- Caught or slipped releases: — / 30
Counts can overlap. This audit cannot prove that your grip caused a miss.
Source: the article’s ten-visit, 30-dart practice audit; no validated pass mark is supplied.
DARTSLIVE’s beginner guidance recommends this three-finger starting grip while also showing two- and four-finger alternatives. Treat three fingers as a starting arrangement, not a rule that every player must follow.
Build Your Grip Around the Balance Point
The barrel is the main metal body of the dart, between the point and the stem that carries the flight. Begin with the assembled dart you actually throw, rather than balancing a bare barrel.
Find a Reference Before Adding Pressure
With the point facing away from you, balance the dart across your index finger until it sits level. That position gives you a reference for your first grip. It need not be the geometric middle of the barrel.
Bring your thumb into place near that reference, holding the barrel between thumb and index finger. Keep the contact comfortable rather than pinching hard. Then let your middle finger provide light support. Its job in this starting grip is to help hold the dart steady, not to become another finger squeezing against the thumb.
This sequence—balance on the index finger, place the thumb, then add middle-finger support—follows DARTSLIVE’s beginner grip guidance. Once you have found a comfortable position, you do not need to rebalance the dart before every throw.
Keep Unused Fingers Clear Without Forcing Them
Let your ring and little fingers sit comfortably clear of the dart. Do not curl them tightly into your palm, but do not force them into a wide spread either. A deliberately posed hand adds another detail you have to reproduce.
Raise the dart into your normal aiming position. Check whether the contact points still feel comfortable there. A grip that looks tidy while your hand is down is not useful if you have to rearrange it as soon as you aim.
Throw with your usual smooth action rather than deliberately twisting or flicking the dart out of your fingers. For this initial check, you are examining the hold, not trying to rebuild the whole throwing motion.
Use the Barrel to Make Placement Repeatable
After collecting your darts, see whether you can find the same contact points again without repeatedly adjusting them. An existing groove or another barrel feature can serve as a reference if it helps.
The reference should guide placement, not dictate it. If a particular groove puts a finger somewhere uncomfortable, choose a different reference. You are looking for a position that is easy to find and comfortable to use, not trying to fill every textured section with a fingertip.
Check all three darts. If you grip the first one naturally but shuffle your fingers on the next two, record those adjustments during the audit. Do not assume that a comfortable first dart means the setup is already repeatable across a visit.
Use Secure Pressure, Not the Loosest Possible Hold
“Secure, not squeezed” is the useful distinction. If the dart slips during your normal throwing movement, the hold needs adjustment. If your fingers whiten or the barrel’s grooves dig into your fingertips, ease the pressure.
In his 1998 grip coaching guide, Karlheinz Zöchling describes the goal as a firm hold without muscular strain. He identifies whitening fingers and digging knurling as signs of excessive pressure and advises against curling unused fingers into a fist.
These are practical observations, not a numerical pressure prescription. The cited guidance does not give a measured force that you should apply, and there is no pressure figure to enter into the audit. Judge whether the dart stays secure and whether the hold feels strained.
Do not chase the loosest possible grip. You still need control as the arm moves forward. If relaxing your fingers makes the dart feel insecure, do not keep reducing pressure just because “light grip” sounds desirable. Return to a secure hold and examine the contact positions as well.
Use “hold, don’t clamp” as a cue for a short practice block. Avoid mentally instructing every finger throughout the throw. Choose either a pressure cue or a placement cue so that you know what you were trying to repeat.
A caught-feeling release does not automatically mean excessive pressure. Record the sensation first. You can examine pressure as one possible change later, without treating every uncomfortable release as a diagnosis.
Front, Middle and Rear Grips Describe Position, Not Quality
A front grip is near the point, a middle grip is around the middle of the barrel, and a rear grip is near the stem. Darts Corner’s grip guide describes these three positions and treats placement as personal preference.
| Position | Where You Hold | What to Check |
|---|---|---|
| Front | Near the point | Comfortable finger contact |
| Middle | Around the barrel’s middle | Easy-to-repeat placement |
| Rear | Near the stem | Secure hold without shuffling |
The checks apply to every position; they are not separate performance claims about front, middle or rear gripping. The position name alone does not tell you which hold will work best for you.
Begin near the balance point, then make a small adjustment if the barrel shape makes that position awkward. You do not have to move a comfortable, repeatable grip to the middle simply because it looks more conventional.
When testing placement, move the contact position without intentionally changing the finger count or pressure at the same time. Otherwise, a different-feeling throw leaves you unsure which change you are evaluating.
Avoid turning a small adjustment into a search across the whole barrel during one practice session. Establish a reference position, record what happens, and compare it with one alternative. That gives you a clearer account of the change than repeatedly moving your hand after individual misses.
Three Fingers Are a Starting Point, Not a Requirement
The thumb-and-index hold with middle-finger support is a straightforward place to begin. DARTSLIVE also shows two- and four-finger alternatives, so a different finger count is not automatically incorrect.
Before adding or removing a finger, identify what you want to examine. Are you repeatedly repositioning a support finger before throwing? Does the release sometimes feel caught? Or are you considering a change only because someone else’s grip looks different?
For the three-finger starting grip, check that the middle finger is supporting the dart rather than squeezing hard. You may be able to make that arrangement comfortable without changing the finger count at all.
If you do try another arrangement, keep the barrel position and intended pressure as similar as practical. Record the new arrangement separately rather than switching between finger counts within the same audit.
There is no need to force a change when the current grip is secure, comfortable and easy to recreate. Equally, the beginner recommendation is not a reason to keep a three-finger hold that requires constant rearrangement. Use the observations from your own throws to decide what deserves testing.
Run a 30-Dart Check Without Changing the Setup
Use this as a grip audit, not a test that proves one grip is best. It separates three observations that are easy to blur together: where the dart lands, whether you adjust your fingers, and how the release feels.
Use the same three darts, stance and target throughout. Aim at the large outer single-20 area, between the treble and double rings. Use the same short warm-up each time before recording results.
Throw ten visits of three darts. Before each dart, use just one cue: “same contact points” or “hold, don’t clamp.” Keep that cue for the block rather than changing it after every miss.
Record three separate tallies:
| Tally | Count This | Maximum |
|---|---|---|
| Target-area hits | Darts landing in the chosen outer single-20 area | 30 |
| Finger adjustments | Darts needing a finger adjustment before throwing | 30 |
| Caught or slipped releases | Darts whose release felt caught or slipped | 30 |
Count each dart at most once in each tally. A dart can appear in more than one category: you might adjust your fingers before throwing and still hit the target. The three tallies are therefore not parts of one total and should not be added together.
If you reposition a finger several times before one throw, count that dart once in the adjustment tally. If a release feels both caught and insecure, count that dart once in the release tally. This keeps the record focused on affected darts rather than the number of sensations or movements.
Enter the completed counts into the tool above. Leave a field blank if you did not record it; a missing tally is not zero. The tool reports your observations and a next check, not a grip score or a prediction of your average.
Read the Tallies Separately Before Making a Change
Target-area hits describe the outcome of this particular block. They do not isolate the grip from the rest of your throw. A caught-feeling release is also an observation, not proof that the grip caused a miss.
If you record finger adjustments, return to the setup. Check whether your chosen barrel reference is easy to find and whether the fingers remain comfortable when you raise the dart to aim. Keep the placement cue for the next check rather than adding several instructions.
If you record caught or slipped releases, review the secure-versus-squeezed distinction. Look for the pressure signs described above, but do not automatically loosen the grip after every awkward throw. A slipping dart and a strained hold need different consideration.
If both adjustments and release discomfort appear, keep them as separate observations. Choose one feature to examine first rather than moving your hand, changing finger count and easing pressure together.
If neither appears, do not change the grip solely because the target-hit count disappointed you. The audit has not identified a setup adjustment or uncomfortable release to investigate. Repeat the check before treating the grip as the explanation for misses.
There is no supplied pass mark for these tallies. The audit is a practice record, not a validated test with a cutoff for an acceptable grip. Its value is in making your comparison specific and repeatable.
Compare One Grip Change on Another Day
Repeat the check on another day before deciding to change anything. Keep the target, darts, stance, warm-up and recording method consistent so that you are comparing the same task.
If you test an alternative, change only one feature: placement, finger count or pressure. Use the guide to changing your darts grip to structure that change rather than rebuilding the hold after a poor visit.
Write down the feature you changed alongside the three tallies. “Held slightly farther back” is more useful for a later comparison than “tried a better grip.” Likewise, distinguish a pressure cue from an actual change in finger arrangement.
Look at target hits, adjustments and release observations separately. Do not declare a grip better from one comfortable throw, one bad visit or one higher hit count. Repeat the comparison before making a commitment.
The working grip is the one you can find again after collecting your darts, hold securely at aim and open without deliberately forcing the release. Keep those checks concrete, and leave the appearance of someone else’s hand out of the decision.