
Set Up a Dartboard You Can Measure—and Trust
Set the bullseye at 68 in, then measure from the installed board face: 7 ft 9.25 in for steel tip or a commonly used 8 ft for soft tip.
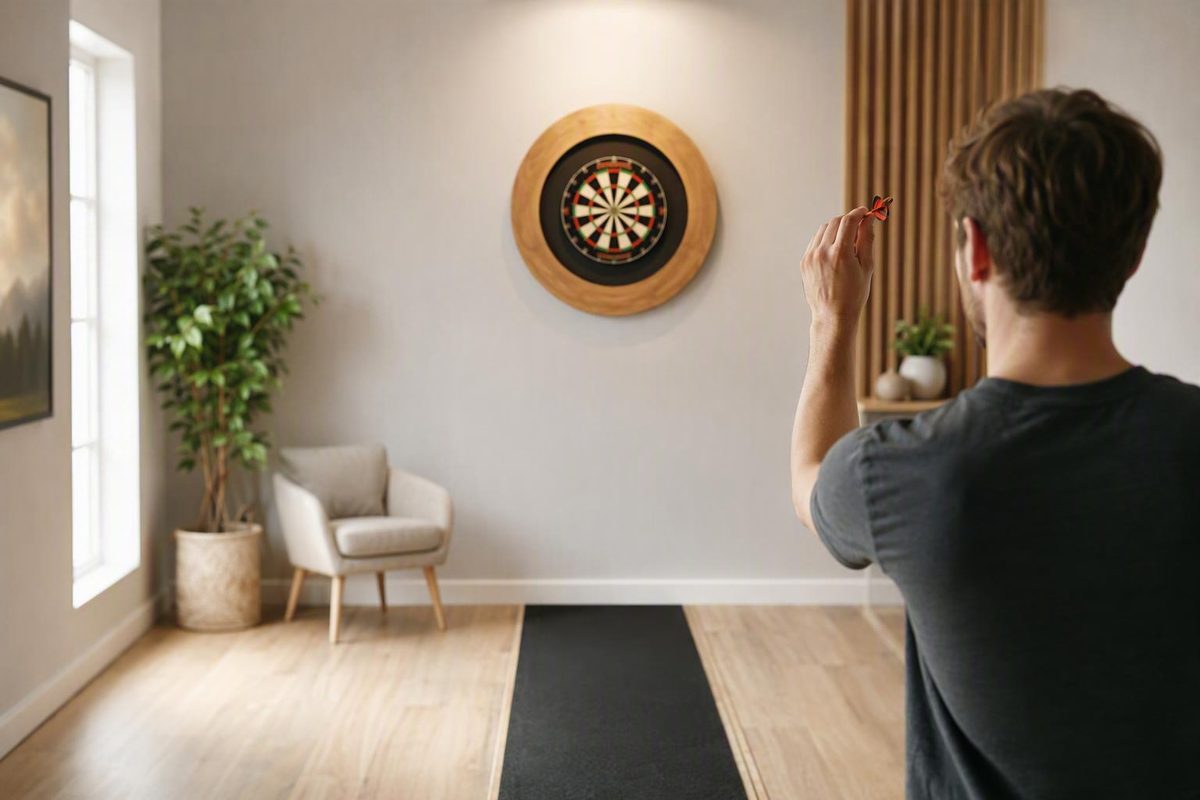
For a conventional standing dartboard setup, place the bullseye 5 ft 8 in (68 in) above the finished playing surface. Mount and stabilise the board before marking the oche, then measure horizontally from the installed board face to the front edge of the throw line: 7 ft 9.25 in for steel tip, or a commonly used 8 ft for soft tip. These measurements and reference points are set out in Darts Corner’s mounting guide. Finish by checking the board’s level and stability, the lighting and the clearance around the throwing lane.
Dartboard setup measurements at a glance
These are commonly used standard measurements for standing play. They should not be treated as proof that every machine, league or competition worldwide uses identical rules.
| Setup | Bullseye height | Horizontal oche distance | Diagonal cross-check |
|---|---|---|---|
| Steel tip | 5 ft 8 in / 68 in / approx. 173 cm | 7 ft 9.25 in / 93.25 in / approx. 2.37 m | Approx. 9 ft 7 3/8 in / 115.375 in / 2.93 m |
| Soft tip | 5 ft 8 in / 68 in / approx. 173 cm | 8 ft / 96 in / approx. 2.44 m | Approx. 9 ft 9.5 in / 117.5 in / 2.98 m |
The height runs from the finished playing surface to the centre of the bullseye. The horizontal distance runs from the face of the mounted board to the front edge of the oche. The listed height, horizontal distances and diagonal checks are given in GLD Products’ dartboard mounting guide; the metric figures are rounded equivalents.
Five feet eight inches converts to approximately 172.7 cm, normally rounded to 173 cm. If you are working in inches, complete the setup in inches rather than switching between exact imperial measurements and rounded metric values halfway through.
For the diagonal check, measure from the centre of the bullseye to the same front edge of the oche. Treat this as confirmation rather than a substitute for the primary horizontal measurement from the board face. Ordinary measuring tolerance and rounded conversions can create a small apparent difference.
An annotated diagram would look like this:
Wall or mounting structure
│
│       board face
│          │
│       [ BULL ]  ← bullseye centre
│          │         68 in above finished playing surface
│ │\
│ │ diagonal cross-check
│ │ \
└──────────┼───\──────────────────── finished floor
│ \
           │<---------------------->│
            horizontal measurement  front edge of oche
            begins below board face
The critical distinction is between the wall plane and the board face. The throwing distance begins below the latter.
For soft-tip play, confirm the requirement for the electronic board, machine, league or competition concerned before fixing the line permanently. Eight feet is common guidance, but it should not be assumed to apply to every format.
Choose a clear, supportable playing area
Decide where the board will go before drilling holes or assembling a stand. You need an unobstructed path between the oche and the target, room to take a normal stance, and enough space to approach the board and retrieve darts without squeezing past furniture.
Keep the darts’ path away from doors, active walkways, spectators and breakable objects. Nobody should be able to enter the lane unexpectedly while a player is throwing. Cabinet doors must also open fully without striking a wall, shelf or fitting; Blatt Billiards’ cabinet-mounting guidance recommends checking open-door clearance and keeping spectators outside the darts’ path.
Allow practical space around the board for missed darts, but do not assume that one exact room width, depth or side clearance applies universally. The room, board type, player movement and presence of a cabinet all affect what is workable.
Next, assess the support:
- For wall mounting, identify the wall construction and any usable structural support.
- For a cabinet, account for the cabinet’s weight and open dimensions.
- For an electronic board, include its specified mounting and power requirements.
- For a stand, confirm that it can be assembled on a firm surface and stabilised as directed.
- For a removable system, install the clamps, brackets or other hardware as instructed and verify that the board remains stable during use.
Skirting boards, cabinets, spacers and clamps can move the board face forwards from the wall. That offset is not itself a problem, but it means the oche cannot be positioned accurately until the board is installed.
Establish the playing surface as well. If a mat raises the player, or the floor slopes between the board and oche, decide which finished surface is being used as the height reference and record it. Do not measure the bullseye from one surface and set the oche from another without accounting for the difference.
Prepare:
- A tape measure
- A pencil or removable marker
- A level
- Mounting hardware suitable for the wall and installed load
- The instructions supplied with the board, cabinet, bracket or stand
Mount the board securely at bullseye height
Use this sequence:
- Identify suitable structural support or a stable stand position.
- Mark the intended bullseye centre at 68 in above the chosen finished playing surface.
- Position, level and secure the bracket or cabinet.
- Attach the corresponding board-side fitting.
- Hang the board.
- Stabilise it so it sits level and does not wobble.
- Rotate the board until the 20 segment is at the top.
This sequence, including the 68 in bullseye position, cabinet alignment and use of rear spacers, is described in the manufacturer’s Instructions for Mounting Dartboards and Cabinets.
A common U-shaped system uses a centre screw fitted to the rear of the board. That screw engages with the wall-mounted bracket. Feet, clips or spacers positioned around the rear edge help keep the board stable and approximately parallel to the wall. Adjust only as the mount’s instructions permit: the centre screw must engage securely without leaving the board loose.
Disc or puck systems follow the same broad logic but use a corresponding rear fitting and a wider receiving bracket. Alignment, screw selection and adjustment procedures vary by product, so do not transfer the instructions for one proprietary mount to another.
For a cabinet, first determine where the bullseye must sit inside it. Mark that position, mount and level the cabinet, secure it, and only then install the board. Open both doors before drilling to confirm that they have sufficient clearance.
Use structural support such as a stud where available, or select fixings for the actual wall material and total installed load. The mounting manual recommends studs where possible and otherwise calls for anchors appropriate to the wall; its listed drill sizes apply only to the hardware covered by that manual, not to every dartboard installation.
Product instructions take precedence if they differ from this general sequence. That applies to bristle boards, cabinets, electronic boards, stands, proprietary brackets and removable systems.
Do not use the board’s centre fixing to carry a substantial light or another heavy accessory unless the mounting-system manufacturer confirms that the combined load is supported. Winmau warns that excessive accessory weight can overload a centre fixing intended for the board and a traditional surround (Winmau dartboard instructions).
Mark the oche from the mounted board face
Do not mark the final oche while the board is still on the floor. Brackets, cabinets, clamps and spacers determine the board’s final playing-face position, so the board must be mounted first.
Drop or project a vertical reference from the board face to the floor. A plumb line, long level or laser can help. From that floor reference, measure straight out along the lane to the front edge of the oche.
Measuring from the wall, cabinet back or bracket makes the lane too long by the depth between that surface and the board face. If the face sits three inches in front of the wall, for example, measuring from the wall introduces that full three-inch error.
Steel-tip example
- Mount and stabilise the board.
- Establish the floor point directly below its face.
- Measure 93.25 in horizontally from that point.
- Mark the front edge of the oche.
- Cross-check approximately 115.375 in diagonally from the bullseye to the same edge.
Soft-tip example
- Mount the board or machine in its final position.
- Measure 96 in horizontally from the board face.
- Cross-check approximately 117.5 in diagonally from the bullseye.
- Verify the applicable machine or league rule before making the oche permanent.
These worked distances correspond to the steel-tip and soft-tip horizontal and diagonal measurements in the GLD setup guidance. Use the horizontal measurement as the controlling result; the diagonal is an approximate check, particularly when rounded metric values are involved.
Mark the boundary with a fixed strip, a correctly positioned mat line or a raised toe line. The relevant point is the front edge—the edge nearest the dartboard—which marks the boundary the player’s feet must remain behind.
Remeasure whenever the board, cabinet, clamp or portable stand moves. Returning a stand to roughly the same place does not necessarily recreate the same lane.
Add only the protection and lighting the room needs
The playing dimensions do not depend on buying a complete accessory set. A surround, backboard, cabinet, mat, raised oche, dedicated light, scorer and stand are optional additions selected according to the room.
| Problem | Useful addition | Limitation |
|---|---|---|
| Missed darts may mark the wall | Surround, backboard or cabinet | Coverage varies; it cannot make an unsafe lane safe |
| Dropped darts may damage the floor | Dart mat or floor protection | Must lie flat and must not change the height reference unnoticed |
| Foot position varies between visits | Fixed strip, marked mat or raised oche | The front edge still needs to be measured correctly |
| Segments are hard to see or shadowed | Bright, even board lighting | Must not obstruct darts or overload the mount |
| Wall drilling is unsuitable | Stable stand or approved removable mount | Must be stabilised and remeasured after movement |
| Manual scoring interrupts practice | Scorer or score sheet | Does not affect the board dimensions |
Existing room lighting may be sufficient if the entire board is easy to read and disruptive shadows do not cover scoring segments. If it is not, add lighting that illuminates the board evenly rather than simply choosing the brightest available fitting.
A surround or backboard addresses wall protection; a mat can protect the floor and preserve a repeatable standing reference. Neither corrects a badly measured board or oche. Likewise, a portable stand solves a mounting constraint only if it remains stable during dart removal and returns to a measured position.
Run a seven-point setup check before throwing
Save or print this final check:
- Height: The bullseye centre is 68 in above the chosen finished playing surface.
- Alignment: The board is level, approximately parallel to the wall, and oriented with 20 at the top.
- Stability: It does not wobble, tilt or rotate during normal dart removal.
- Oche: The front edge is the correct horizontal distance from the installed board face. The diagonal is only an approximate confirmation and should be consistent within normal measuring and rounding tolerance.
- Format: The measurement matches steel-tip or soft-tip play and any applicable machine, league or competition rule.
- Visibility: The full board is evenly visible without obstructive shadows.
- Lane clearance: Doors, walkways, spectators and breakable objects remain outside the active throwing lane.
The 68 in height and the format-specific board-face measurements used in this check are supported by Darts Corner’s setup guidance.
If the distance is wrong, first confirm that the measurement began at the board face, not the wall. If the board wobbles, adjust the centre screw, feet, spacers or proprietary mount only as its instructions allow. If a previously accurate oche no longer agrees, inspect the bracket, cabinet or stand for movement before shifting the line.
A repeatable setup is more useful than one that merely looks correct. Record the final height, horizontal distance and floor reference so that future checks produce a comparison rather than a guess.
Keep the setup consistent after installation
Rotate a bristle board by several segments periodically to spread wear. Remove and replace the number ring so that 20 remains at the top after every rotation. The appropriate frequency depends on use; visibly concentrated wear is a more useful trigger than an arbitrary universal schedule.
Keep a bristle board dry rather than soaking or spraying its playing surface. Use smooth, serviceable points, and avoid hooked or mechanically aggressive points that can pull fibres during removal. Winmau’s bristle-board maintenance instructions recommend board rotation, dry storage, keeping liquids away from the playing surface and avoiding damaging point conditions.
Inspect the bracket, cabinet, spacers and other fixings for loosening or movement. Pay particular attention after rotating the board, relocating a stand or adding an accessory.
Remeasure the bullseye height and oche distance whenever the board, bracket, cabinet, mat or stand shifts. A raised or replaced mat can alter the playing-surface reference even when the wall mounting has not moved.
The sequence to remember is simple: mount and stabilise the board at the specified bullseye height, locate the oche from the installed board face, verify the distance for the format being played, and record the finished setup. The aim is not a room full of accessories. It is a safe, stable lane whose physical references remain unchanged from one measured practice session to the next.
Can you lean over the oche when throwing a dart?
Generally, yes. A player may lean their upper body over the oche, but their feet must remain behind its front edge while throwing. Target’s oche setup guidance describes the same boundary. Check the rules governing a particular competition if there is any uncertainty.
Can a dartboard’s center fixing support a heavy lighting system?
Not automatically. Check the mounting system’s stated load capacity and whether it permits the proposed light. If the manufacturer does not explicitly approve the combined load, support the lighting separately rather than asking the board’s centre fixing to carry it.